Mdulos RF 433MHz Par Rx Tx Arduino Radio Inalmbrica - Transmiso


About 433 Connection
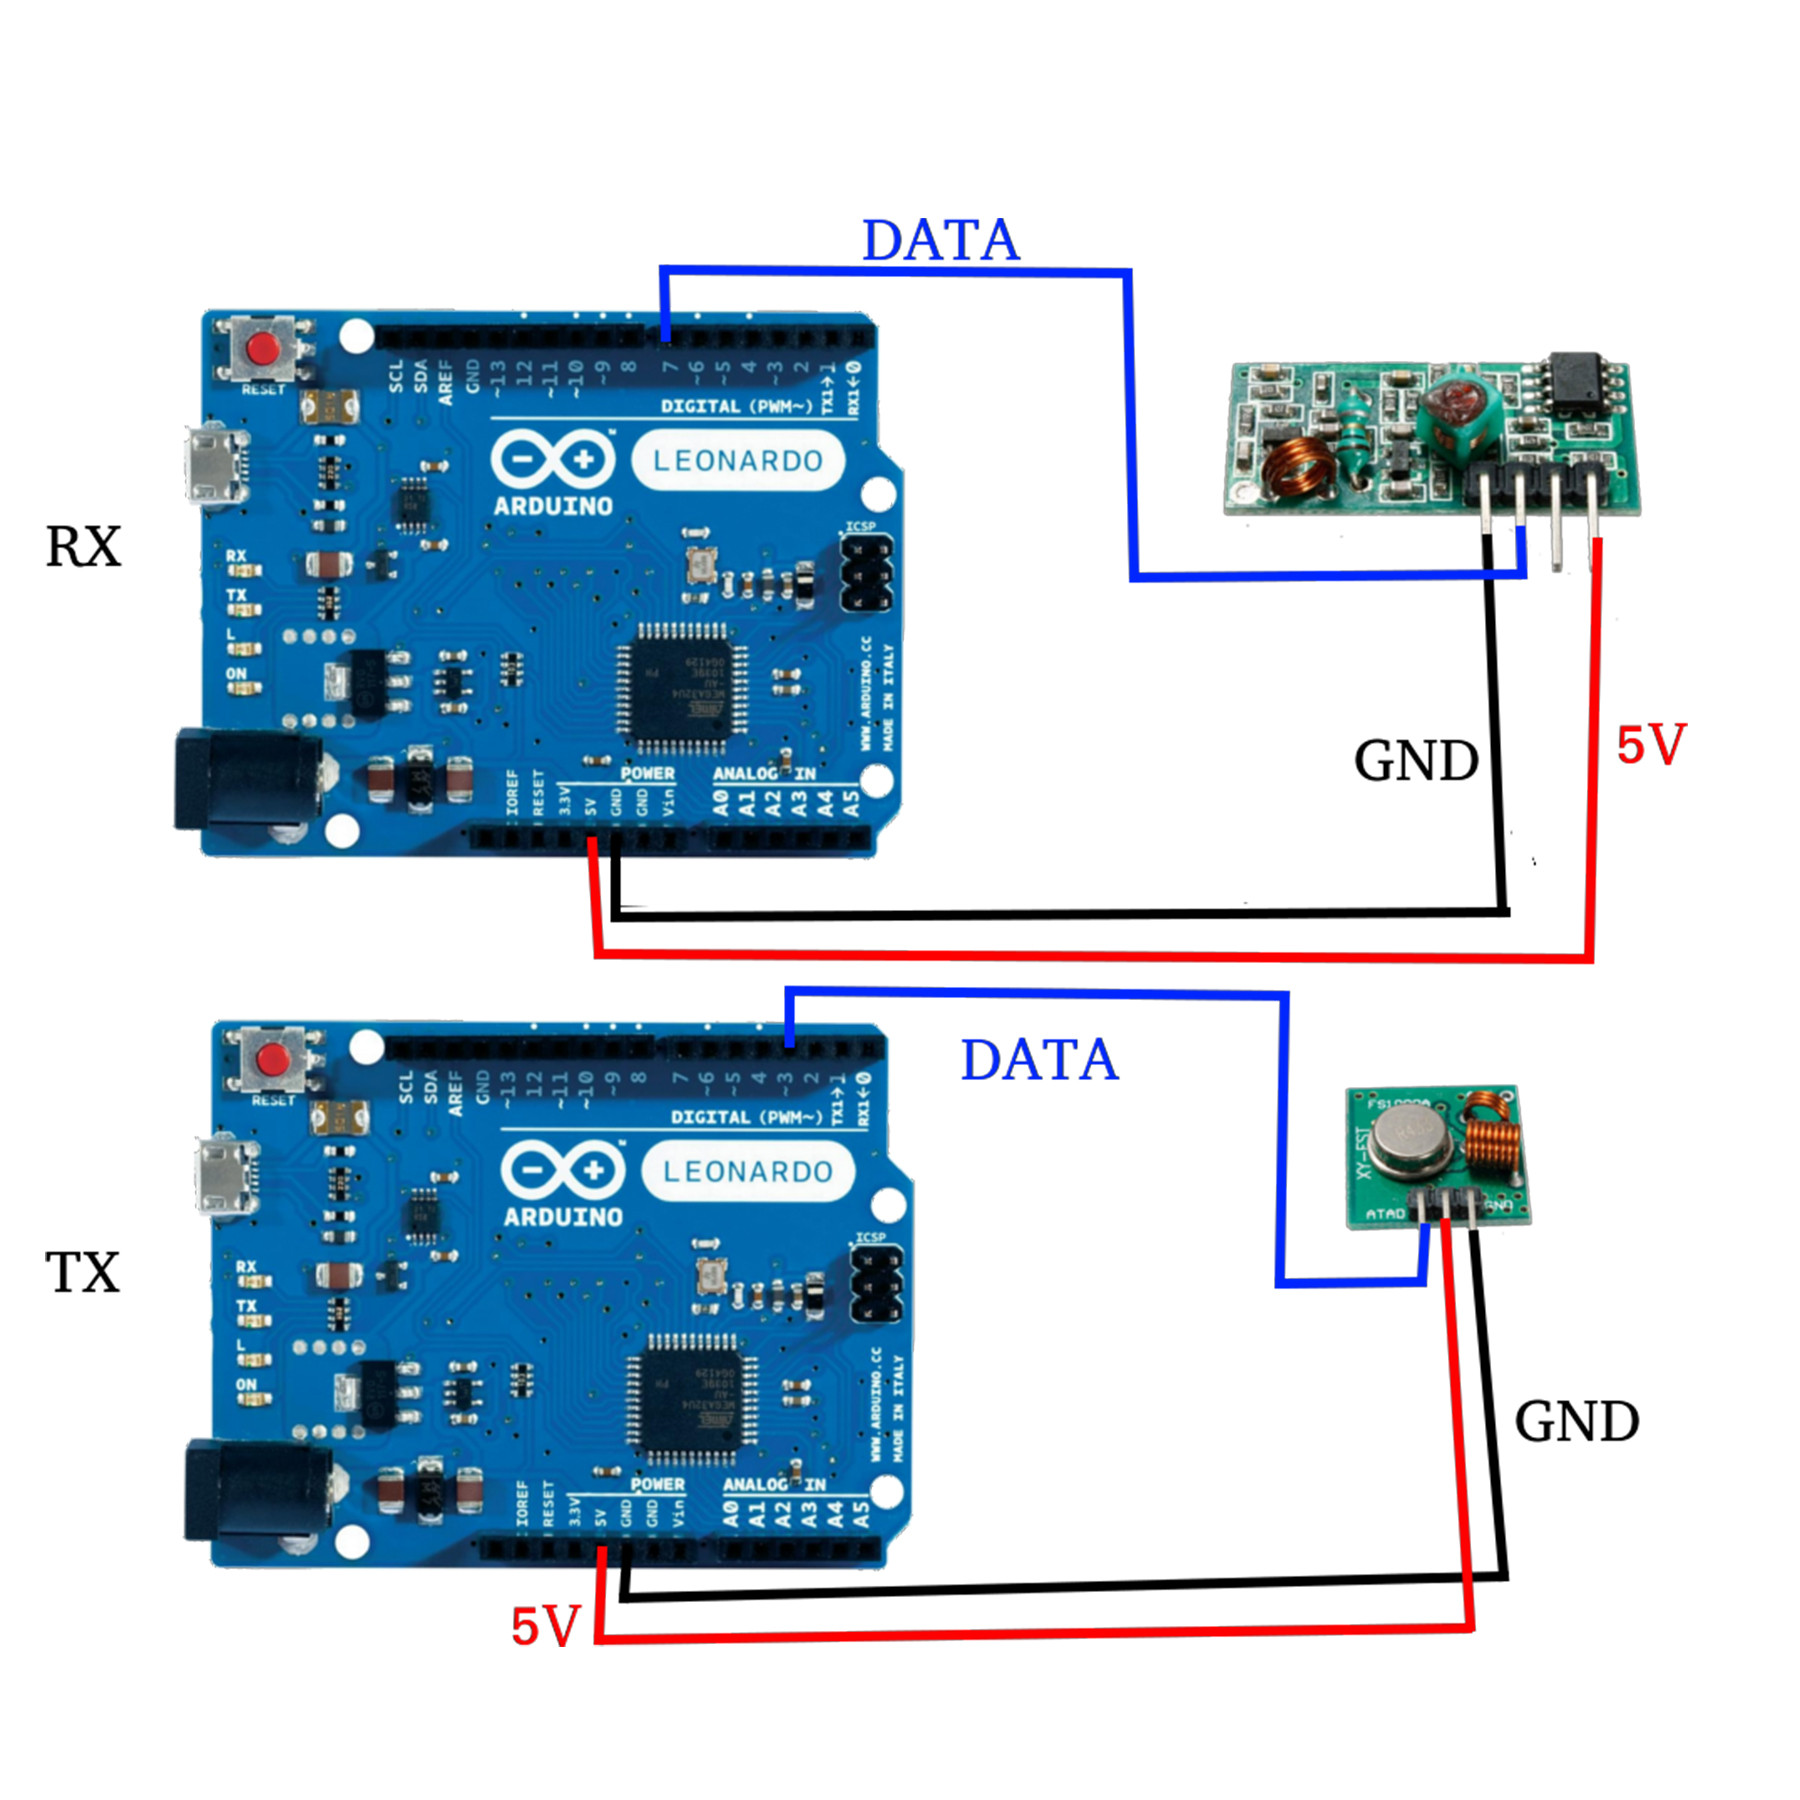
Here at RF Transmitter side, we have used Arduino Nano. Wiring the receiver module is also very simple, and once again you only need to make three connections. Connect the modules VCC and ground pins to the pins of the Arduino and connect the data out pin to pin D12 of the Arduino. For 433MHz RF receiver sider, we have used Arduino Pro mini.
An Arduino board will be connected to a 433 MHz transmitter and will send the quotHello World!quot message. The other Arduino board will be connected to a 433 MHz receiver to receive the messages. Parts Required. You need the following components for this example 2x Arduino - read Best Arduino Starter Kits RF 433MHz ReceiverTransmitter
Connect the VCC pin on the module to the Arduino's 5V pin and the GND pin to Ground. Finally, connect the Data-in pin to digital pin 12 on the Arduino. We recommend using digital pin 12 for a specific reason - the library we'll be using later is already set up to work with this pin by default, saving us extra programming steps.
Arduino Nano RF 433 MHz Control Code. 433MHz Radio Frequency Transceivers can transmit or receive radio signals. You can wirelessly control electronic components with radio signals, or get data from sensors. Control your electronic components by sending commands in binary numbers ones and zeros. Find out the exact commands by reading the
The module only has three connection, they are as follows VCC - This can be any positive DC voltage from 3 to 12 volts. In this experiment we will get 5 volts from our Arduino. GND - The ground connection, connected to one of the Arduino ground terminals. DATA IN - This is connected to pin 12 of the Arduino. You should try and use pin 12
An Arduino board will be connected to a 433 MHz transmitter and will send the quotHello World!quot message. The other Arduino board will be connected to a 433 MHz receiver to receive the messages. Parts Required. You need the following components for this example 2x Arduino - read Best Arduino Starter Kits RF 433MHz ReceiverTransmitter
Interfacing 433Mhz RF Module with Arduino. Let's learn how to Interface 433Mhz RF Module with Arduino. We will be sending data between two Arduino boards, so we will need two Arduino boards, two breadboards and a couple of jumper wires. Connect the VCC pin to 5V pin and GND to ground on the Arduino. The Data-In pin should be connected to
These RF modules are very popular among the Arduino tinkerers. The 433MHz is used on a wide variety of applications that require wireless control. These modules are cheap and you can use them with any microcontroller MCU. In this project the transmitter is sending a message quotHello World!quot to the receiver via RF. Those messages are being
Connecting and testing the 433MHz RF Transmitter and Receiver modules using Arduino. Connecting the Transmitter. Connect VCC to 5V of Arduino, GND to one of the Arduino ground terminals and the DATA to pin 12 of the Arduino. We use pin 12 since the RadioHead library we'll be using in our sketch uses this pin for data output.
In This Blog, We Will Be Seeing, How You Can Interface The 433MHz Rf Module With Arduino And Transmit The Data From One Place And Receive It At The Other Place Wirelessly.