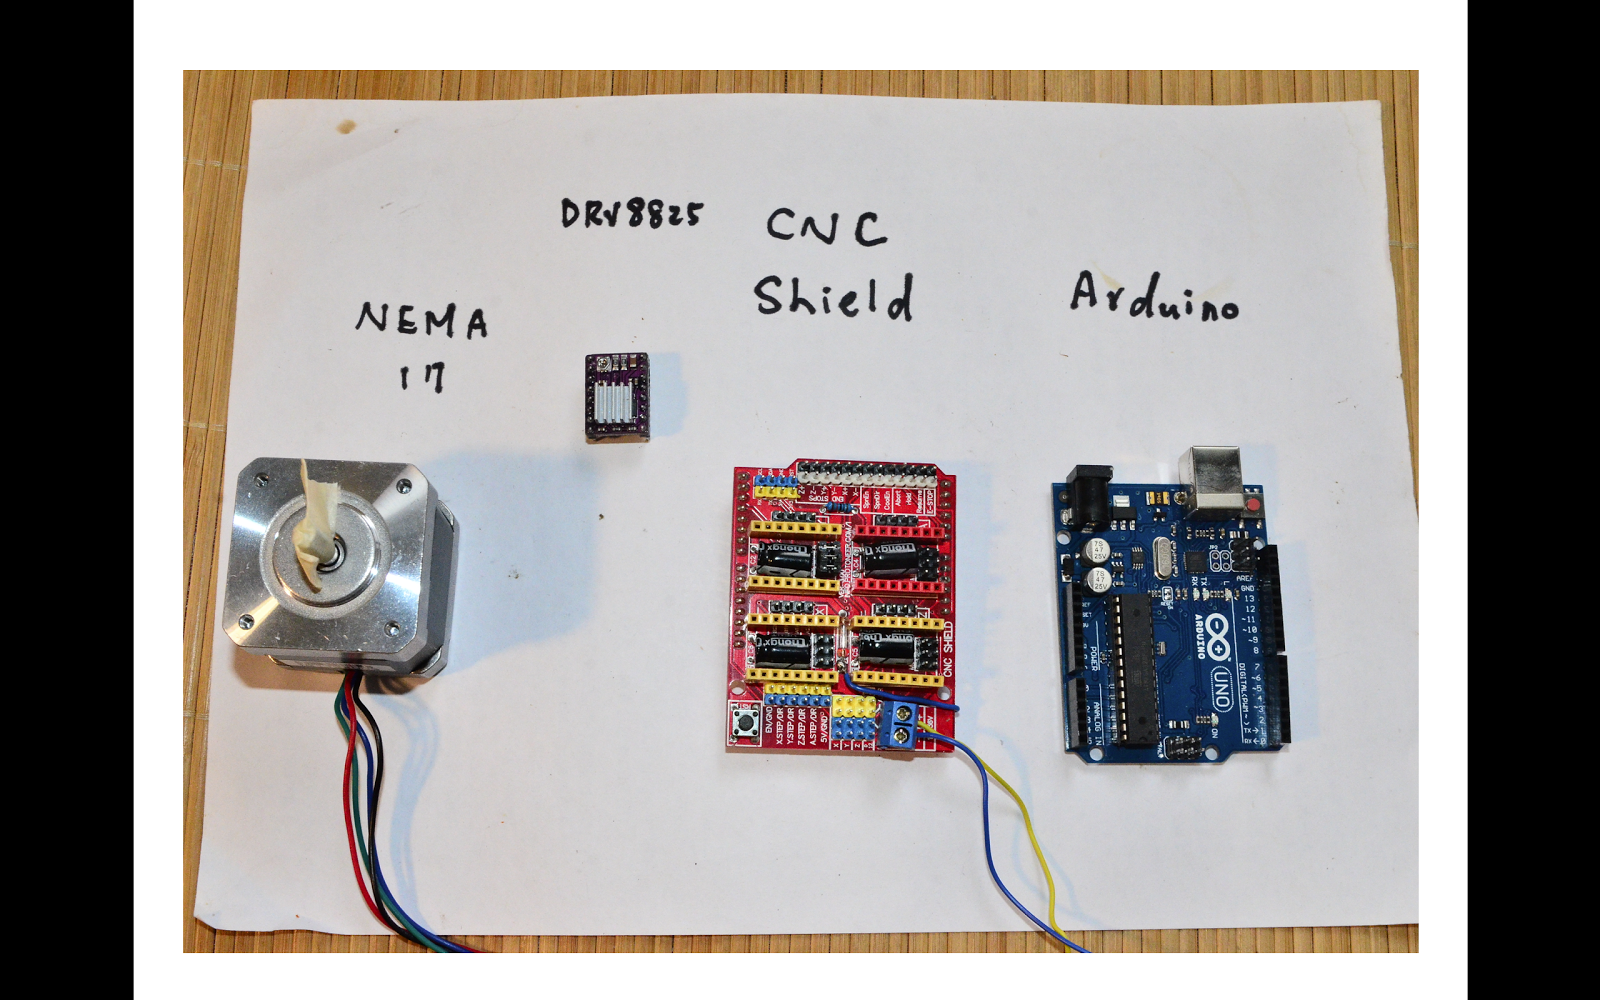
Arduino CNC Shield Control Stepper Motor With DRV8825


About Stepper Driver
Browse amp discover thousands of brands. Read customer reviews amp find best sellers. Find deals and low prices on arduino cnc shield at Amazon.com
A new generation of intelligent, fully programmable motor drives from NANOTEC. Also available as motor with integrated controllerdrive.
To be able to manage a machine like a CNC or a 3D printer with several stepper motors, it is interesting to have a board that facilitates the connection of the different elements of the machine. This is the role of the CNC shield. Material. Arduino UNO CNC Shield V3 Stepper driver A4988 or DRV8825 or SilentStepStick USBA male to USB B male cable
Hello all, For a small home project I need to control four stepper motors individually. The Arduino UNO CNC shield looks perfect, it seems it can drive four stepper motors as it allows driving four stepper drivers. However, when looking at example code, e.g. link then I see only three stepper motors being driven i.e. x y and z.
A4988 Stepper motor driver with Arduino. DRV8825 Stepper motor driver with Arduino Arduino CNC Shield Hardware Overview. You fit the Shield onto the Arduino UNO microcontroller and connect the motors directly to the output pins of the drivers. You choose the drivers based on the power of the motors and the application. The main parts of the
Mount the CNC Shield V3 on an Arduino UNO Align the pins of the CNC Shield V3 with the corresponding headers on the Arduino UNO. Press down gently to ensure a secure connection. Install Stepper Motor Drivers Insert the stepper motor drivers e.g., A4988, DRV8825 into the designated slots on the CNC Shield V3.
The Arduino CNC Shield makes it easy to get your CNC projects up and running in a few hours. It uses open-source firmware on Arduino to control 4 stepper motors using 4 pieces of A4988 Stepper Motor driver breakout board, with this shield and Arduino UnoMega, you can build all kinds of robotics, linear motion projects or projects including CNC routers, laser cutters and even pick amp place
The Arduino CNC Shield basically allows you to easily connect up to 4 stepper motor drivers and motors to your Arduino project while connecting them to very specific pins in the Arduino UNO. The GRBL software, which you have to deploy into your Arduino, knows which pins are used to control each stepper motor, so the Arduino CNC Shield and GRBL
Next, install the stepper motor driver ensuring that the enable pin on the driver aligns with the enable pin on the shield. Connect the external power to the shield, making sure you connect the power up the right way. If not connected correctly you can cause damage to the shield, stepper motor drivers and Arduino board.
It works seamlessly with stepper drivers like A4988, DRV8825, or the more advanced SilentStepStick drivers, which are responsible for generating the necessary pulses to control the stepper motors. With its plug-and-play design, the CNC Shield V3 can be mounted directly onto the Arduino board without additional wiring.
CNC Shield vs DIY Wiring Stepper Drivers to Arduino and Stepper Motors. Connecting stepper motors to a CNC shield is easier than DIY wiring, but it has some limitations. In short, a CNC shield eliminates the need for a lot of wiring. It looks neat and takes up a small space. But it is only suitable for lasers, 3D printers, and small 3-axis CNC
Secondly, connect the CNC shield to the Arduino UNO board. Step 3. Thirdly, connect the A4988 stepper motor driver to the shield. Step 4. Now, prepare the stepper motor wires using the pictures below. For that, I used a flat screwdriver. Step 5. And then, connect the stepper motor connector to the X-axis connector.